Thursday, April 17, 2014

Robin's Egg Cookies

Robin's Egg cookies are a fun project to make during Spring and Easter. Make them with your children or the neighborhood kids on a weekend and enjoy as a treat afterwards, or wrap them up in a goodie bag and pass out on Easter Sunday. A great excuse to bring out one's own talent! I chose to use Royal Icing as it hardens nicely and once dried you can't dent or mess up the look! Take a crack at it!
TOOLS
2 baking sheets
Parchment Paper
Standing Mixer
Measuring cups & spoons
Rubber spatula
Rolling pin
Egg cookie cutter
2 cooling wire racks
Double boiler or microwave for melting chocolate
INGREDIENTS
3 cups all purpose flour
3/4 tsp baking powder
1/4 tsp salt
1 cup unsalted butter, softened
1 cup sugar
1 egg, beaten
1 tbsp milk
Powdered sugar, for rolling out dough
DIRECTIONS
Sift together flour, baking powder and salt. Set aside.
In a stand mixer with paddle place butter and sugar and beat until light in color then add egg and milk. 

Put mixer on low speed and gradually add flour and beat until mixture pulls away from the side of the bowl. Divide the dough in half, wrap in waxed paper, and refrigerate for 2 hours. Preheat oven 375 degrees F.

Sprinkle surface where you will roll out dough with powdered sugar. Remove 1 wrapped pack of dough from refrigerator at a time, sprinkle rolling pin with powder, and roll out dough to 1/4" thick. Press egg cookie cutter throughout the dough and place cookie 1" apart on parchment lined or on a silcone baking mat over your cookie sheet. Repeat this till you are out of dough. Bake for 7-9 minutes or until cookies are just beginning to turn brown around the edges, rotating cookie sheet halfway through baking time. 

After 2 minutes out of the oven, transfer cookies to a wire rack to finish cooling.
ROYAL ICING

Wilton's Royal Icing creates a hard-drying, long lasting decoration that has a matte finish. You'll have to work quickly and make sure to close the lid on your glass (not plastic) container if you are going to walk away.  Once it dries it will not smear or leave a dent.
TOOLS
Standing mixer
Glass container with plastic lid for storing royal icing
Small decorating spatula
1 new toothbrush or thin paint brush
Drying cookie rack

INGREDIENTS
1-1/2 tbsp Meringue Powder such as Wilton's found in your local craft store - bakery dept. 
8oz sifted confectioner's sugar
3-5 tbsp lukewarm water
Teal or Turquoise food coloring
1/3 cup chocolate chips
DIRECTIONS
Make sure all utensils are grease free.
Place confectioner's sugar and meringue powder in a bowl. Stir or mix at low speed until blended. Add water and mix 7-10 minutes at low-medium speed until icing loses its sheen. Add a drop of the Teal food coloring untill you get the desired Robin's Egg color. To prevent drying, be sure to cover the bowl with a damp cloth while working with icing. To reuse, beat on low to restore original texture. If the icing is too thick add a teaspoon of water at a time to loosen. 
After cookies have cooled and the royal icing is made, begin spreading the royal icing on each cookie with the small decorating spatula, smoothing it out carefully doing your best to create a nice smooth surface. Let the cookies dry for about an hour on the cooling racks. 
Once the cookies are dry and ready, separately melt the chocolate in a double boiler or microwave very carefully and slowly untill you get a thin melted consistency. With the paint brush slowly make small chocolate dots on the dried royal icing replicating a Robin's Egg. I prefer to use a new toothbrush dipped in chocolate and with your thumb run across the bristles back and forth, this will 'spray' small chocolate drops. You will be happier with the results. Much easier but a bit messy. Your choice!
Cookies can be stored in an airtight container for up to 1 week.  

Makes about 2 dozen 4" x 3" egg cookies.  The egg cookie cutter can be purchased at Sur la Table, William Sonoma or Amazon.com I bought mine at William Sonoma.
Sugar Cookie recipe from Food Network - Alton Brown.

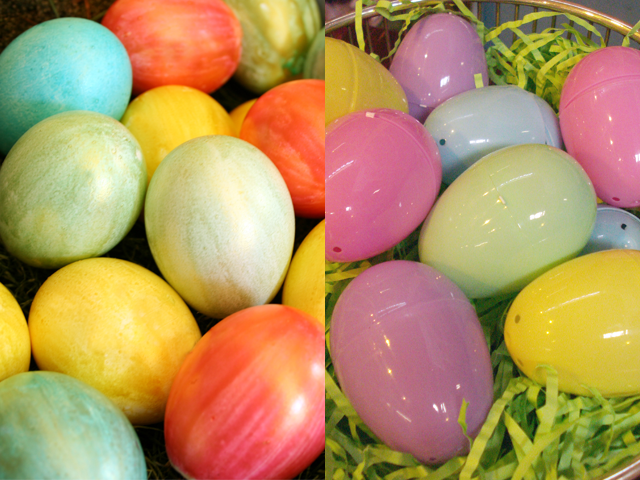
Happy Easter Basket!

Sunday, April 13, 2014

Confetti Easter Eggs (Cascarones)

Spring time means Easter Confetti Eggs in our family and a time for eating lots of eggs! When I see all the Easter decorations in the shops a few weeks before that's usually a reminder that I need to start working on the hallowed eggs untill I get about 2 dozen.
The story behind Confetti Eggs or Cascarones is rumored to have originated in China and brought to Europe by Marco Polo. In Italy they were first used as a courting ritual, filled with perfume and then capped with wax. Men would throw them at women they found attractive. The custom then traveled to Spain and was later brought to Mexico in the mid-1800s by Emperor Maximilian’s wife. It was in Mexico that the perfumed powder was replaced with confetti.
In Spanish, cáscara means eggshell. Cascarones are common throughout Latin American and are similar to the Easter eggs popular in many other countries. They are mostly used in Mexico during Carnival, but in US and Mexico border towns the cultures combined making them a popular Easter tradition. While you may see cascarones at the carnival celebrations in the US, it is more common to see them around Easter. This is because, like many other Latin traditions, there has been a merging with the US holiday tradition of dyeing hard boiled eggs. 
Having one broken over your head is said to bring good luck. 
Cascarones are increasingly popular in the Southwestern United States. They are especially prominent during the two-week, city-wide Fiesta festival in San Antonio, TX. I live in CA now, and recently to my surprise saw these sold at my local grocery store, Ralphs! I guess a sign of the tradition migrating westbound.
TOOLS
1 Egg Coloring Kit from your local grocery or craft store
2 dozen hollowed out eggs
Confetti or in my case dollar bills!
1-2 Pastel colored streamer rolls or tissue paper cut into 1.5" squares
Scissors
Glue
Paper towels
2 dozen straws or coffee stirers for holding the eggs to dry
2-3 containers or drinking glasses (to hold your straws eggs for drying)
DIRECTIONS
Making Cascarones, first open the top of an egg. You can use a pin or knife to break a hole on the end of the egg and pour the egg out. You can use the egg to make scrambled eggs or flan if you want. The shell must then be rinsed and cleaned out and let to dry.
Once the eggs have dried decorate them using an egg dye kit, watercolors, markers or paint. Egg coloring kits are available at your local grocery or craft store.

When the paint is dry, fill the inside with confetti, in my case I am using a few dollar bills in place of confetti for my teenage nieces and nephews...shh they don't know this! Lastly apply a small amount of glue around the outside of the egg, hold and cover with tissue or crepe paper. 

Wait until the glue has dried before smacking the cascarone on an unsuspecting person or save them or the egg hunt on Easter Sunday!
Happy Easter Egg Hunting!


Monday, March 31, 2014

Puppy Dog Treats

Make your new pup some well deserved puppy dog treats! Fido will love the fact that you made them yourself with lots of love and care, especially 'cause their little tummies get upset easily with the wrong food. Below are 2 recipes that are easy on the stomach and will bring lots of happiness to your pup after you've come home from a walk in the park. 
Enjoy!

Recipe #1 Pumpkin Dog Treats

INGREDIENTS
2 eggs
1 cup canned pumpkin
2 tbsp smooth peanut butter
2-1/2 cups whole wheat flour
1/2 tsp salt
3/4 tsp ground cinnamon


TOOLS
Dog bone cookie cutter, mine is 3" long
2 baking sheets
2 wire cooling racks
Parchment paper
Rolling pin
Mixer with paddle attachment
Measuring cups & spoons
2 cooling racks


DIRECTIONS
Preheat oven to 350 degrees.
In a stand mixer, mix eggs, peanut butter, wheat flour, salt and cinnamon. Dough should resemble cookie dough, if it's too sticky add flour to your work surface, if it's too dry add a little bit of water. Roll the dough till 1/4" thick and press your cookie cutter into the dough. Bake for 40 minutes. Make sure the cookies are hard. Makes about 3 dozen 3" lengthwise doggie bone cookies.

Recipe #2 Chicken & Oats Dog Treats

INGREDIENTS
1/2 cup smooth peanut butter
1/4 cup honey
1 tbsp virgin coconut oil or olive oil
1 cup chicken broth
1 cup rolled oats
1 cup wheat flour
 1 cup all-purpose flour 


TOOLS
Same as above.

DIRECTIONS

Preheat oven to 350 degrees.
Whisk together peanut butter, honey, oil and chicken broth.
In a separate bowl combine flours and oatmeal. Mix dry ingredients with the wet ingredients. Place dough on flour dusted surface. Roll dough till 1/4" thick. Use the dog bone cookie cutter to press out cookies. Roll out leftover scraps and repeat process. Place cookies on a parchment paper lined baking sheet.
Bake for 15-17 minutes, until dog treats are hard. 
Transfer to a cooling rack. Makes about 3 dozen 3" lengthwise doggie bone cookies.


Puppies don't always sit still.
Not quite ready for his close up!


Good puppy!

Wednesday, February 12, 2014

Valentine Chocolate Heart Sablés


J'adore Chocolate Sablés

Another great French import! If you are ever in Paris and baked goods and sweets are your thing then a pilgrimage to the Pierre Hermé boutique www.pierreherme.com is a must, but you have to like waiting in lines as you won't be the only one waiting to sample some of its delicious baked goods. This rich French double chocolate 'sandy' (sablé) cookie is a French chocolate shortbread cookie. Delicate and soft in texture but oh so dangerously rich in chocolate flavor, especially for all you chocoholics. They are addicting! 

This recipe comes from my Miette cookbook, Miette (crumb in french) is a lovely charming pastry shop in San Francisco www.miette.com check it out if you are ever in the city. 

So go ahead, make these lovelies for your loved ones this Valentine's Day, trust me you'll be their favorite person over and over.


Love and sugar are in the air!


INGREDIENTS
1 cup all purpose flour
1/3 cup natural unsweetened cocoa powder not Dutch processed. Reco: Scharfeen Berger, as it helps obtain a deep dark chocolate flavor
1/2 tsp baking soda
3/4 cup unsalted butter at room temperature
2/3 cup granulated sugar
1/4 tsp sea salt
3/4 tsp vanilla extract
3-1/2 oz 70% chocolate grated, or powder such as Ghiradeli
red, pink or white sugar sprinkles


TOOLS
Heart shaped cookie cutter
2 baking sheets
2 wire cooling racks
Sifter
Rolling pin
Parchment paper
Mixer with paddle attachment
Measuring cups & spoons


DIRECTIONS
1. Sift together flour, cocoa butter and baking soda into a bowl and set aside.

2. In stand mixer bowl fitted with paddle attachment beat together butter, sugar, salt and vanilla for about 4 minutes. Add the dry ingredients and grated or finely chopped chocolate and just mix to combine.

3. If the dough is soft wrap it tightly in plastic wrap for about 30 minutes. (The dough will keep wrapped in plastic, for up to 1 week in the refrigerator or 3 months in freezer.) Otherwise, roll out the dough to 1/2" thick on a lightly floured surface and press the cookie cutter against the dough.  

4. Place them 2" apart on a parchment-lined baking sheet. Sprinkle lightly with red or pink sugar.

5. Preheat oven to 350˚ F. Bake the cookies until they are firm, 10 to 12 minutes. Remove to a wire rack to cool. Store in airtight container for up to 2 weeks.

Makes about 3 dozen 2" cookies


Happy Valentine's Day!!


Tuesday, February 4, 2014

Sea Salt Chocolate Chip Cookies by Jacques Torres

Arguably the best chocolate chip cookie recipe according to the New York Times when they printed this recipe a few years back from Jacques Torres, master pastry chef. Food bloggers have been raving about this cookie over and over and the peeps eating them! 

These cookies are a dream if you are looking for a crunchy outside and soft center. First of all the sprinkling of sea salt on top before the cookie is baked is what makes these cookies so special. It provides the perfect marriage of sweet and salty. Secondly you must let the dough chill for at least 12 hrs and no more than 36 hrs. I wait exactly 24 hrs then bake, plan ahead and be patient, it's well worth it!


Here's how they are made:


INGREDIENTS
1-1/4 tsp baking soda
1-1/2 tsp baking powder
1-1/2 tsp coarse salt
1-1/2 sticks (1-1/4 cups) unsalted butter
1-1/4 cups light brown sugar
1 cup plus 2 tablespoons granulated sugar
2 large eggs
2 tsp vanilla extract
1-1/4 lbs bittersweet chocolate chips, at least 60% cacao
sea salt
2 cups minus 2 tbsp cake flour
1-2/3 cups bread flour


TOOLS
2 cookie trays
parchment paper or non stick baking mat
mixer with paddle attachment
small cookie scoop
plastic wrap
wire rack


DIRECTIONS:
1. Sift flours, baking soda, baking powder and salt into a bowl. Set aside.

2. Using a mixer fitted with paddle attachment, cream butter and sugars together until very light, about 5 minutes. Add eggs, one at a time, mixing well after each addition. Stir in the vanilla. Reduce speed to low, add dry ingredients and mix until just combined, 5 to 10 seconds. 

3. Drop chocolate pieces in and incorporate them. Press plastic wrap against dough and refrigerate for minimum of 12 hours. Dough may be used in batch, and can be refrigerated for up to 72 hours.

4. When ready to bake, preheat over to 350 degrees. 

5. Line a baking sheet with parchment paper or a nonstick baking mat. Set aside. 

6. Using the cookie scoop, scoop equal amounts of dough onto baking sheet (my small cookie scoop is about 1 tbsp of dough and the size of baked cookie is about 3" round). Sprinkle lightly with sea salt and bake until golden brown but still soft, 17-19 minutes. 

7. Transfer sheet to a wire rack for 10-15 minutes to cool. Repeat with remaining dough, or reserve dough, refrigerated, for baking remaining batches the next day. Eat warm! 

Makes about 5 dozen cookies!


Sunday, January 12, 2014

Vanilla Bean Snowflake 'mallows


Happy New Year and Happy New Blog! 

Hello! 

I work in the advertising industry by day in Los Angeles and am a lover of all things baking, photography and blogging on the weekends! My blog is about my love for testing out recipes that I source out from many food sites, magazines or bribed secret family recipes from close friends and granny-mas! Did I tell you I love reading about food? Seeking out what's the latest trend in the world of food and restaurants is a hobby of mine - whether using himalayan pink salt, gluten free flour or lavender extract!  I love it and look forward to sharing all the wonderful things that I discover, of course adding my own pinch of this and dash of that too!

Here goes... 

On a lazy, hazy, gray January winter weekend morning in Southern California instead of coffee go for a lovely cup of hot chocolate, and while you're at it add a bit of pillowy bliss - homemade marshmallows! I made these recently on a day like this and turns out it takes a little more than a few hours before you have the luxury of topping your hot chocolate! So I recommend you make them a night before.

Even though our winters don't compare to the ones any state north or east of us it's still nice to curl up to a good cup of hot chocolate, even if the sun is out and it's a mere 65 degrees. BRRRRRR!


Here's how they are made:

INGREDIENTS
non stick cooking spray
3 (1/4 oz) packages unflavored gelatin
1/2 cup cold water
2 cups granulated sugar
2/3 cup light corn syrup
1/4 tsp coarse salt
1 tsp vanilla extract, plus 1 vanilla bean scraped
powdered sugar for coating


TOOLS
9x9 square pan or rectangle
parchment paper
rubber spatula
standing mixer
medium saucepan
large bowl


DIRECTIONS
1. Lightly spray a 9"x9" or rectangle pan not that much larger with cooking spray. Line pan with parchment paper leaving a 2-inch overhang on all sides; set aside.

2. In the bowl of an electric mixer fitted with the whisk attachment, sprinkle gelatin over 1/2 cup cold water; let stand for 10 minutes. 

3. In a medium saucepan, combine sugar, corn syrup and 1/4 cup water. Place saucepan over medium-high heat and bring to a boil; boil rapidly for 1 minute. Remove from heat, and with the mixer on high, slowly pour the boiling syrup down the side of the mixer bowl into the gelatin mixture. 

4. Start your timer for 12 minutes. During this time add salt and continue mixing. In a few minutes you will begin to see beautiful white puffiness!

5. Add vanilla extract and vanilla bean seeds, continue mixing until well combined. 

6. Spray a rubber spatula with non-stick cooking spray. When the timer is up, pour and spread the marshmallow mixture evenly into the pan using the spatula to spread the mixture. Let stand for a minimum of 2 hours or overnight, uncovered. 

7. On your work surface or counter sprinkle some powdered sugar.

8. Carefully lift the parchment paper sides apart from the pan and onto your work surface that is lightly coated with powdered sugar place marshmallow 'block' on the surface and with clean kitchen scissors or a sharp knife cut marshmallow squares or use your favorite cookie cuter shape, I used snowflakes and stars.

9. Place 1/2 cup of powdered sugar in a large bowl. Working in batches add cut marshmallows to the bowl and toss to coat.

10. Marshmallows can be stored in an airtight container for up to a 2 weeks. Recipe adapted from Martha Stewart.


    Enjoy!